Tuning Disk Layout
When layering ext3, LVM, RAID5, and Advnaced Foramt disks, several areas can be tuned to improve throughput.- Hard drive sectors and partitions: When creating partitions on Advanced Format (AF) hard drives, the partitions should start on 8-sector (4 KiB) boundaries. The AF drives have native 4-KiB sectors but emulate 512-byte sectors through firmware (512e). When writing, best performance is achieved when data streams are multiples of 4 KiB and aligned to the native sectors. Starting partitions on 4 KiB boundaries help the file system align data blocks to disk sectors.
- LVM data and RAID5: On a RAID5 device the best write throughput is achieved when entire stripes are overwritten with new data. Otherwise, stripes must be read first in order to calculate parity. Aligning LVM data to RAID5 stripes helps the file system fill up stripes whenever possible.
- ext3 and RAID5: Knowing the chunk size of the underlying array, an ext3 file system can avoid creating a bottleneck by spreading file system data over several hard drives. Use the “-E stride=” option when formatting a volume to provide this hint.
- ext3 and hard drive sectors: As mentioned earlier, AF 512e hard drives perform best when data streams are multiples of 4 KiB. Use the “-b 4096” option when formatting an ext3 volume to set the the block size to 4 KiB.
Tutorial Setup
For this tutorial I will use a virtual machine instead of a real system because I don’t have spare Advanced Format hard drives. In any event, the calculations discussed here remain valid even on a virtual machine.Goal of this tutorial: Install ClearOS Enterprise 5.2 SP1 on a system with three AF 512e hard drives. Combine the hard drives into a RAID5 array. Manage this array with LVM. Install OS on one logical volume. Use the remaining space as shared volume under Flexshare.
Booting to Rescue Mode
The first step is to boot into ClearOS rescue mode. Insert the CD, boot the system, and enter “rescue” when prompted by GRUB. Select the appropriate language and keyboard. Choose the local CD-ROM as the rescue image source. It is not necessary to start the network interfaces. Skip the search for an existing ClearOS installation. When the system is ready, a bash shell prompt will be on the screen.Disk Partitions
Both “fdisk” and “parted” are available in the rescue mode. Instead of getting into details of either tool, I will just show how the hard drives are partitioned.# fdisk -lu /dev/sda /dev/sdb /dev/sdc Disk /dev/sda: 10.7 GB, 10737418240 bytes 20 heads, 32 sectors/track, 32768 cylinders, total 20971520 sectors Units = sectors of 1 * 512 = 512 bytes Device Boot Start End Blocks Id System /dev/sda1 * 64 195199 97568 83 Linux /dev/sda2 195200 20971519 10388160 fd Linux raid autodetect Disk /dev/sdb: 10.7 GB, 10737418240 bytes 20 heads, 32 sectors/track, 32768 cylinders, total 20971520 sectors Units = sectors of 1 * 512 = 512 bytes Device Boot Start End Blocks Id System /dev/sdb1 * 64 195199 97568 83 Linux /dev/sdb2 195200 20971519 10388160 fd Linux raid autodetect Disk /dev/sdc: 10.7 GB, 10737418240 bytes 20 heads, 32 sectors/track, 32768 cylinders, total 20971520 sectors Units = sectors of 1 * 512 = 512 bytes Device Boot Start End Blocks Id System /dev/sdc1 * 64 195199 97568 83 Linux /dev/sdc2 195200 20971519 10388160 fd Linux raid autodetectPlease note that on every disk the first partition starts from sector 64 and the second starts from sector 195200. Since both 64 and 195200 are divisible by 8, partition boundaries line up with 4 KiB hard drive sectors. Also, the ID of the second partition is set to 0xfd, for “Linux raid autodetect”. This allows the Linux kernel to start RAID arrays automatically.
Creating RAID5 Array
To create a RAID5 device on “/dev/md0″:mdadm -C /dev/md0 --level 5 -n 3 --chunk 128 /dev/sda2 /dev/sdb2 /dev/sdc2“-C /dev/md0” tells mdadm to create a new array at device node “/dev/md0″. “—level 5” and “-n 3” specify a RAID5 array with 3 drives. “—chunk 128” sets the chunk size to 128 KiB. “/dev/sda2″, “/dev/sdb2″, and “/dev/sdc2″ are the component devices. These are the RAID autodetect partitions shown earlier.
A quick explanation on “chunk”: A component device in a RAID5 array is divided into chunks. Parallel chunks from different devices form a stripe. Every stripe has a parity chunk. The remaining chunks hold data. The chunk size should be given to “mkfs.ext3″ when setting up an ext3 file system.
I am not certain what the best chunk size is. I read in an archived email exchange that performance degrades when chunks are larger than 256 KiB. Elsewhere Some argue that large chunk sizes are better for ext2/ext3. Another web site argues best chunk sizes are dependent on file sizes.
Creating LVM Volumes
Commands to LVM group, root volume, and Flexshare storage volume:lvm pvcreate --dataalignment 256k /dev/md0 lvm vgcreate -s 4M raid_group /dev/md0 lvm lvcreate -L 3g -n root raid_group lvm lvcreate -l 100%free -n flexshare raid_groupThe first command “pvcreate” initializes /dev/md0 for LVM. The second command “vgcreate” creates a volume group named “raid_group”. The third command creates a logical volume of 3 GiB called “root”. The fourth command assigns all remaining space in the volume group to the volume “flexshare”.
The “–dataalignment 256k” option of “pvcreate” ensures that LVM data starts from a stripe boundary. “–dataalignment 256k” tells LVM to align start of data on “/dev/md0″ to a multiple of 256 KiB. Since 256 KiB is also the data size in a stripe, the effect is that LVM data starts from the boundary of a stripe. (Each stripe on “/dev/md0″ has 2 data bearing chunks. Each chunk is 128 KiB, so each stripe holds 256 KiB data.)
“-s 4M” tells “vgcreate” that the physical extents in “raid_group” are 4 MiB. Without RAID the size of physical extents has no significant impact on the IO performance of logical volumes. However In a RAID5 setup the physical extent size should be a multiple of RAID5′s stripe size. This, along with “–dataalignment” option of “pvcreate”, ensures logical volumes start and end on stripe boundaries.
The “-l 100%free” option in the second “lvcreate” tells the command to assign 100% of the free space in “raid_group” to the logical volume “flexshare”. This option is convenient. There is no need to determine how much space remains when it is used.
Formatting Logical Volumes
The final step in rescue mode is to format the logical volumes.mkfs.ext3 -b 4096 -E stride=32 /dev/raid_group/root mkfs.ext3 -b 4096 -E stride=32 /dev/raid_group/flexshareThe “mkfs.ext3” command line has two options. “-b 4096” specifies that ext3 file systems will use 4096-byte blocks, same size as the native hard drive sectors. The second option “-R stride=32” tells “mkfs.ext3″ that for the underlying RAID5 array each chunk is as large as 32 ext3 blocks. (128 KiB per chunk and 4 KiB per block yields 32 blocks per chunk.) As mentioned earlier, “mkfs.ext3″ uses this information to avoid bottleneck.
Installing ClearOS
Now the disks are prepared, reboot the system and start the ClearOS installer. Follow the normal installation flow until the disk partitioning screen. Here highlight “I will do my own partitioning” and select “OK”.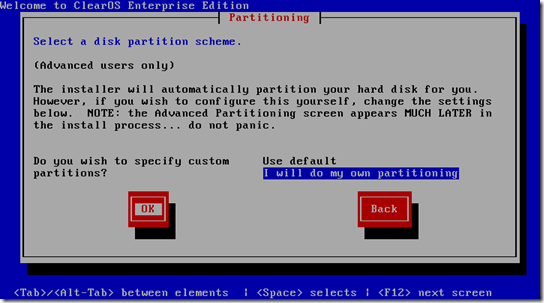
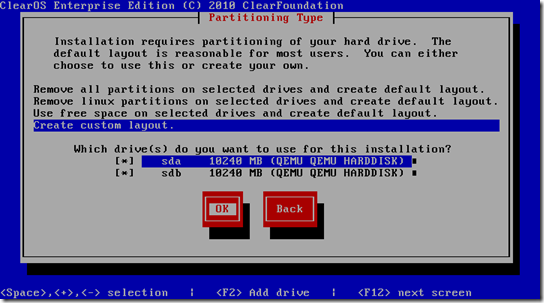
Several screens later the installer will come to the partitioning type screen, asking how the disks should be partitioned. Here highlight “Create custom layout” and select “OK.”
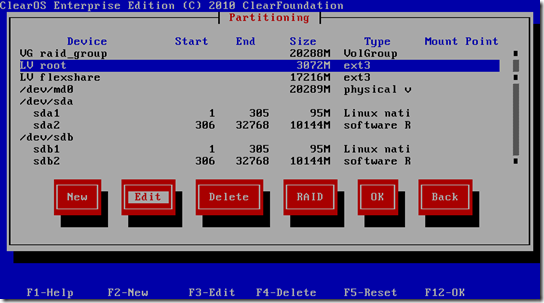
On the next screen is a list of all disks, partitions, RAID, LVM group, and LVM volumes in the system. We’ll start by configuring the the root volume. Highlight “LV root” and select “Edit”.
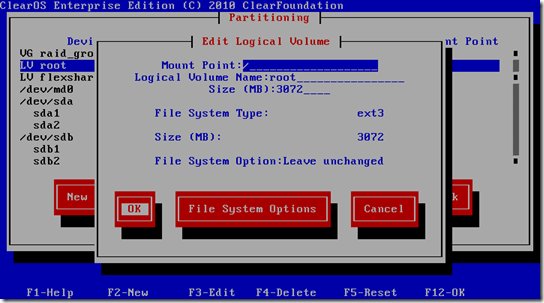
On the “Edit Logical Volume” screen specify “/” as the mount point. Make sure the “File System Option” field is “Leave unchanged” to keep the file system created in the rescue mode. Now select “OK” to return to the device list.
Now let’s set up the flexshare volume. Highlight “LV flexshare” and select “Edit.” On the “Edit Logical Volume” screen specify “/var/flexshare/shares” as the mount point. Again make sure “File System Option” is “Leave unchanged”, then select “OK” to return to the device list.
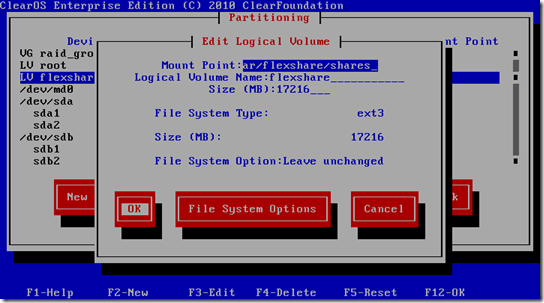
We’ll now configure the boot volume. Highlight “/dev/sda1” and select “Edit”. Unlike configuring “LV root” and “LV flexshare”, the first thing here is to select “File System Options” to choose its format.
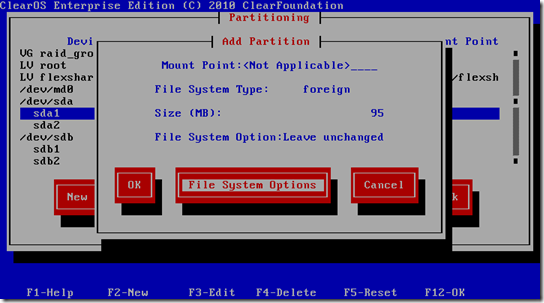
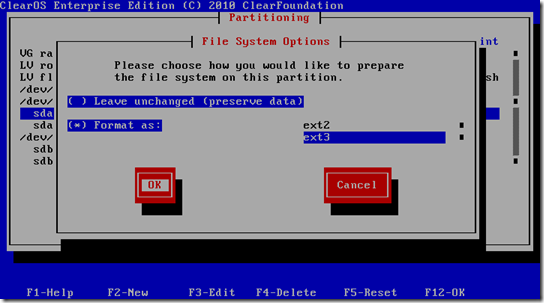
On the “File System Option” screen mark “Format as” and highlight “ext3”. This tells the installer to format “/dev/sda1” as ext3 volume before store files there. Select “OK” to return to the previous screen.
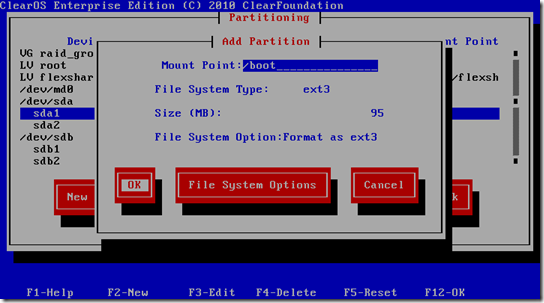
Now we’re ready to specify the mount point as “/boot”. Select “OK” to return to the device list.
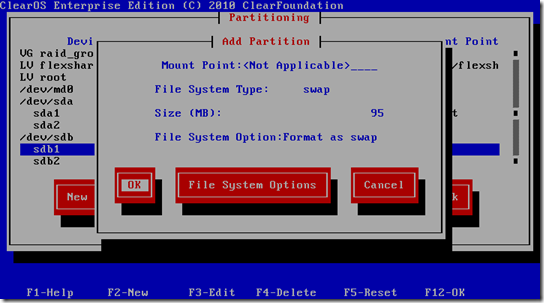
Optionally, swap volumes can be set up on “/dev/sdb1″ and “/dev/sdc1″. To configure “/dev/sdb1″ as swap, highlight “/dev/sdb1” and select “Edit”. Select “File System Options” on the next screen. Mark “Format as” and highlight “swap” on “File System Options” screen. Select “OK” to return to the “Add Partition” screen.
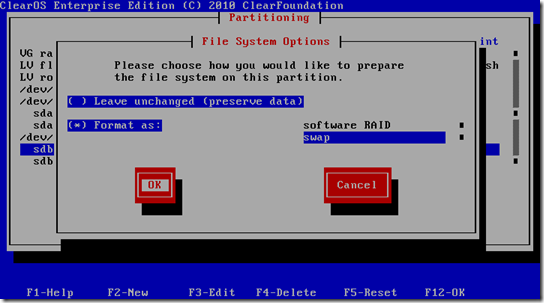
Since a swap volume does not have a mount point, just select “OK” again to return to the device list.
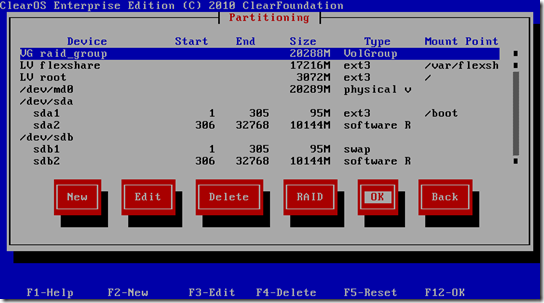
Now the device list shows the final configuration for the system: “LV root” to be mounted on “/”, “/dev/sda1″ on “/boot”, “LV flexshare” on “/var/flexshare/shares”, and optionally “/dev/sdb1″ and “/dev/sdc1″ configured as swap space. After reviewing the list, select “OK” to continue installation.
Later the installer may ask to confirm choices of partitions, volumes, and swap spaces. It will also ask for GRUB options. File copying starts after these questions are answered.


No comments:
Post a Comment