
SIM versus micro-SIM
Presumably at some point T-Mobile will realize there's now an opportunity to reach users of unlocked iPhones and offer micro-SIMs as well as standard SIM cards. (When we called T-Mobile's PR department, they declined to comment about the unlocked iPhone.) In the interim, then, you'll need to make your own micro-SIM.
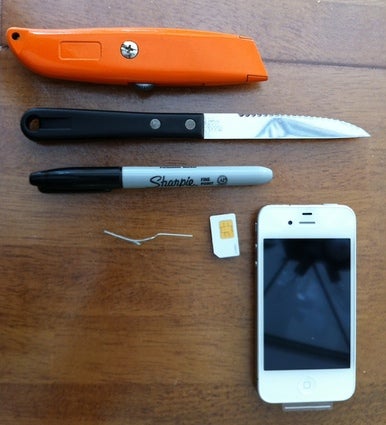
To carve that SIM into a micro-SIM, you’ll want to gather a few tools: your unlocked iPhone, your T-Mobile SIM card, a sharp knife (I used a box cutter), and a pen or marker. You might want a cutting board, too.
I used a paper clip, too, only to discover that Apple still does provide a SIM removal tool (it looks like a teeny, tiny dagger) with every iPhone 4. Oops. Well, if you lose it, you can still use a paper clip instead.
1. Find the slot
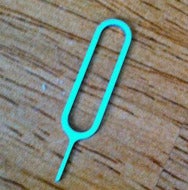
The included SIM-removal tool.
2. Open with the SIM tool (or a paper clip)
Use that SIM tool for what it was intended for. Or, if you're like me, needlessly sacrifice a paper clip to the cause, and poke one end into the hole. I had to push with a fair amount of pressure to get the micro-SIM card tray to eject. Pull out the tray. If this is a brand new unlocked iPhone 4, it will be empty.3. Trace your cutting path
Grab your full-sized T-Mobile SIM and your marker, and using the iPhone’s micro-SIM tray as a guide, trace around the edge of your SIM.4. Cut the SIM
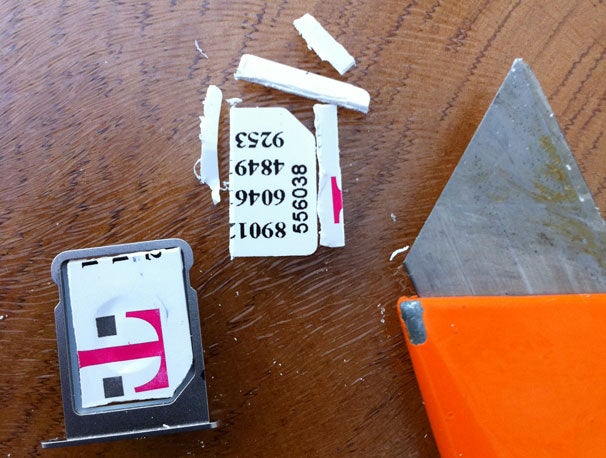
Now, you need to cut your SIM to micro-SIM size. The important part—the part you can’t cut—is the circuitry, and it’s really obvious: It’s the shiny part. As you cut your SIM card, leave the gold side facing you, so that you can be sure you don’t cut it.If you cut the shiny part of your SIM card, it won’t work anymore. You can buy (and sometimes request from T-Mobile) a new one, but if all your contacts are stored on your current card, you don’t want to break yours. Measure twice, cut once. But also remember that you can always cut the card more if you leave it too big at first, but you can’t really make a too-small SIM bigger.
I traced some broad lines on my SIM card and then used my box cutter to saw deeply along the lines. (If you own an X-Acto knife or some similar weapon, you may find you have an easier time of it.) Once I sawed sharply enough I carefully used my fingers to bend and twist the SIM card—remaining, of course, exceedingly attentive to (and protective of) the circuitry—until the extra pieces snapped off.
5. Load it up
Once your SIM surgery is complete, your resized card should fit comfortably in the micro-SIM tray. The shiny part faces down, with what’s left of the T-Mobile logo facing up.Slide the tray—with the SIM atop it—into the iPhone. If the iPhone still says No SIM after a moment, eject the tray again and try reorienting your card. In my case, the T-Mobile logo had to be oriented upside down for the iPhone to recognize the SIM.
After just a few seconds, your iPhone should successfully connect to the T-Mobile network. But—at least until the release of iOS 5—you’ll need to connect it to iTunes first. Plug the phone in, let iTunes perform its initial sync, and then disconnect your phone.

The trouble with MMS
Here are the steps that T-Mobile hoped would enable me to send and receive MMS messages with the unlocked iPhone 4. Spoiler alert: It didn’t quite work.
Go to the Settings app, and choose General -> Network -> Cellular Data Network. Under MMS, set:


APN: epc.tmobile.com
Leave Username and Password blank.
MMSC: http://mms.msg.eng.t-mobile.com/mms/enc
MMSC Proxy: 216.155.165.50:8080
Leave MMS Max Message Size blank.
MMS UA Prof URL: http://www.apple.com/mms/uaprof.rdf
Then, back out to the main screen of the Settings app by tapping Network and then General, and then Settings at the top left; this ensures your newly-entered details are saved. Now, restart your iPhone by holding down the Sleep/Wake button until “Slide to Power Off” appears. Restart your iPhone by holding down that button again—waiting until the phone finishes shutting off completely first, of course.
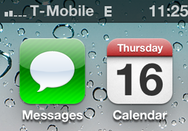
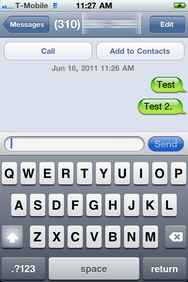
When you restart your iPhone, the missing Camera icon should reappear in the Messages app. It did for me. But when I attempted to send or receive multimedia messages, it didn’t work. T-Mobile eventually suggested I contact Apple for support, and to Apple’s credit, the company did walk through several steps with me to try to correct the issue. Successful MMS’ing still eludes my setup, but if we figure it out, we’ll update this story.


Good tips on how to use a T-mobile SIM on an unlocked iPhone 4. Unfortunately my iPhone 4 was locked to some other network. So I unlocked it using remote unlocking service. I got the remote unlocking service for my iPhone from Unlock-Zone.com at affordable cost with easy unlocking guide.
ReplyDelete